Stereonets#
[1]:
from apsg import *
StereoNet class#
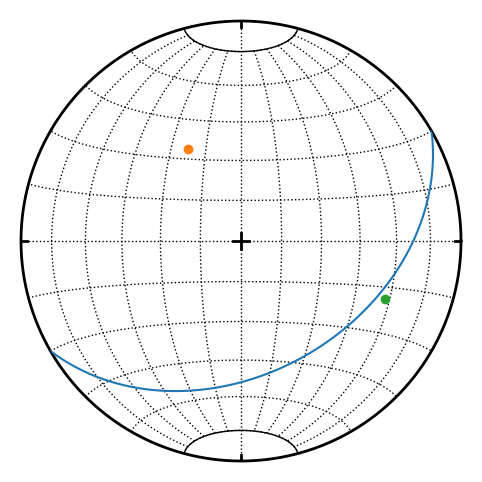
StereoNet allows to visualize features on stereographic projection. Both equal-area Schmidt (default) and equal-angle Wulff projections are supported.
[2]:
s = StereoNet()
s.great_circle(fol(150, 40))
s.point(fol(150, 40))
s.point(lin(112, 30))
s.show()
Small circles (or cones) can be plotted as well
[3]:
s = StereoNet()
l = linset.random_fisher(position=lin(40, 15), kappa=10)
s.point(l, color='k', ms=3)
s.point(l.ortensor().eigenlins(0), color='g')  # Principal eigenvector
s.confidence(l, method='watson', level=0.99, color='g')  # Watson 99% confidence cone on mean
s.show()
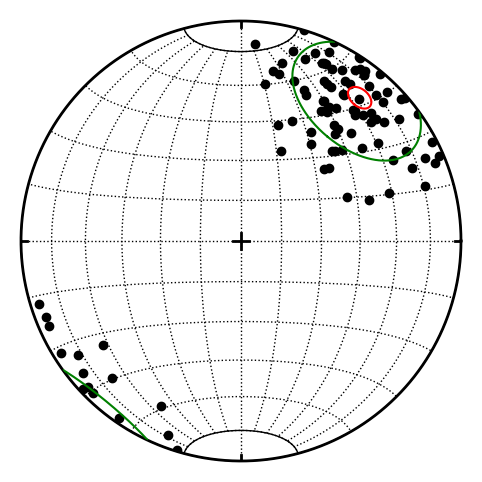
Besides Watson’s cone shown above, confidence also supports Fisher’s cone (the default) and a nonparametric bootstrap cone:
[4]:
s = StereoNet()
s.point(l, color='k', ms=3)
s.confidence(l, method='fisher', level=0.95, color='r')
s.confidence(l, method='bootstrap', n_resamples=500, color='b')
s.show()
For groups of symmetric tensors, e.g. EllipsoidSet of AMS tensors or strain ellipsoids (or Stress3Set), confidence uses method='jelinek' (the default for tensor sets) and plots the confidence ellipses of the principal axes of the mean tensor following Jelínek (1978), see EllipsoidSet.mean_tensor. All three ellipses are drawn unless which (0, 1 or 2) selects a single principal axis. Use normalize=True to normalize tensors before averaging and anisoft=True for the
extra (n-1)/n factor of other implementations:
[5]:
import numpy as np

rng = np.random.default_rng(42)
R = np.asarray(rotation.from_axisangle(lin(30, 20), 50))  # orient the fabric obliquely
mats = []
for _ in range(12):
    noise = rng.normal(scale=0.08, size=(3, 3))
    mats.append(R @ (np.diag([1.3, 1.0, 0.7]) + (noise + noise.T) / 2) @ R.T)
es = ellipsoidset([ellipsoid(m) for m in mats])

s = StereoNet()
s.confidence(es, color='b')                        # all three principal axes
s.confidence(es, which=2, color='r', lw=3)         # only the minor axis
s.confidence(es, anisoft=True, color='g', ls=':')  # extra (n-1)/n factor
s.show()

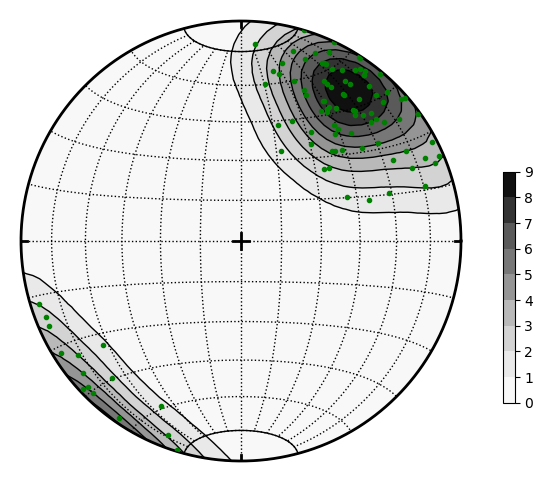
For density contouring a contour method is available
[6]:
s = StereoNet()
s.contour(l, levels=8, colorbar=True)
s.point(l, color='g', marker='.')
s.show()
Each call to contour adds an independent density layer, so contours from different datasets (or different contouring settings) can be overlaid on the same net:
[7]:
l1 = linset.random_fisher(position=lin(60, 5), kappa=20)
l2 = linset.random_fisher(position=lin(320, 50), kappa=10)

s = StereoNet(title="Two contour layers")
s.contour(l1, levels=4, cmap="Reds")
s.contour(l2, levels=4, cmap="Blues")
s.show()
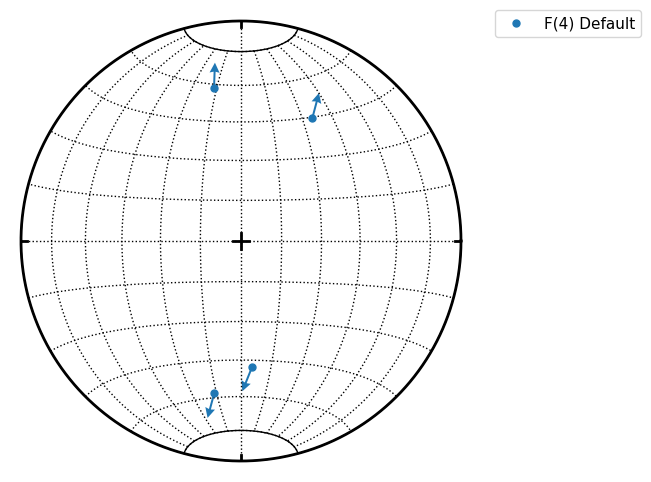
APSG also provides pairset and faultset classes to store pair or fault datasets. It can be initialized by passing list of pair or fault objects as argument or use class methods from_array or from_csv
[8]:
p = pairset([pair(120, 30, 165, 20),
             pair(215, 60, 280,35),
             pair(324, 70, 35, 40)])
p.misfit
[8]:
array([2.0650076 , 0.74600727, 0.83154705])
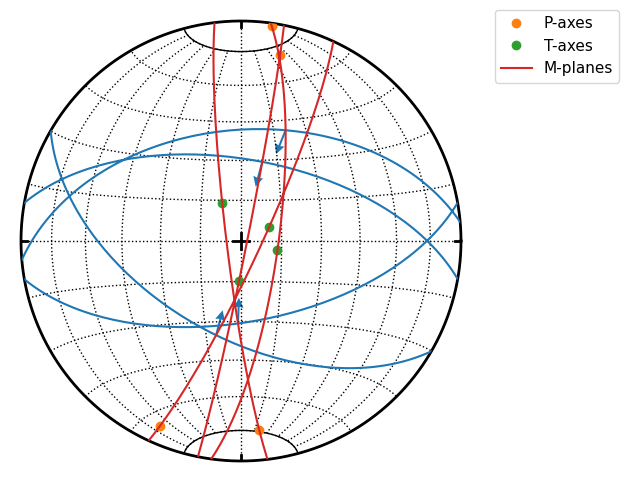
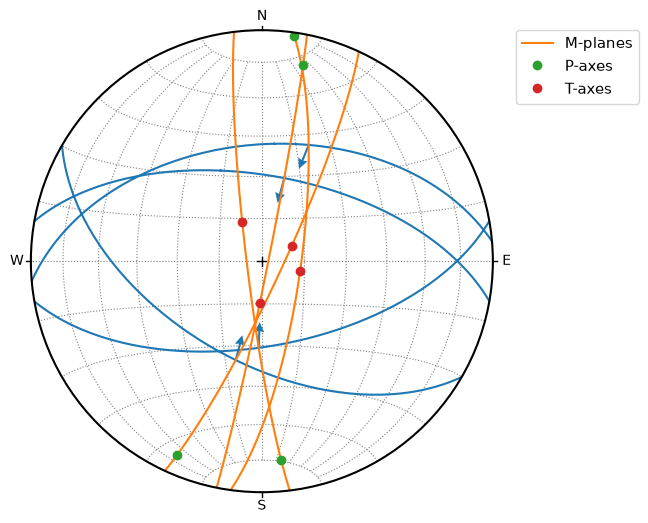
StereoNet has two special methods to visualize fault data. The fault method produces classical Angelier plot
[9]:
f = faultset([fault(170, 60, 182, 59, -1),
              fault(210, 55, 195, 53, -1),
              fault(10, 60, 15, 59, -1),
              fault(355, 48, 22, 45, -1)])
s = StereoNet()
s.fault(f)
s.great_circle(f.m, label='M-planes')
s.point(f.p, label='P-axes')
s.point(f.t, label='T-axes')
s.show()
The hoeppner method produces Hoeppner diagram and must be invoked from StereoNet instance
[10]:
s = StereoNet()
s.hoeppner(f, label=repr(f))
s.show()

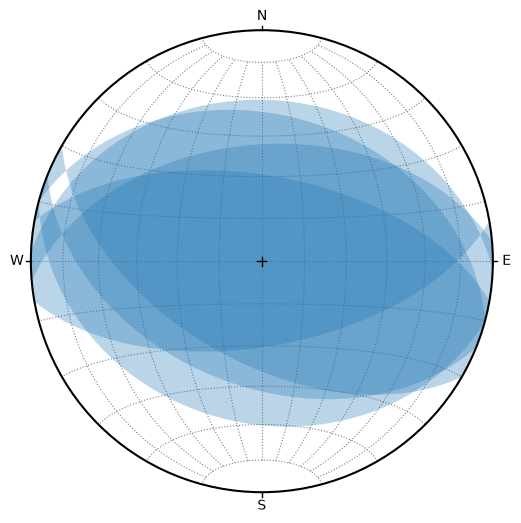
The dihedra method fills the extensional dihedra of faults, the pair of opposite quadrants between the fault plane and the auxiliary plane (perpendicular to the slip) that contain the T axis. Dihedra of a FaultSet add up where they overlap, so the region compatible with all of the faults stands out (leave alpha unset for a default that gets lighter with the number of faults):
[11]:
s = StereoNet()
s.dihedra(f)
s.show()
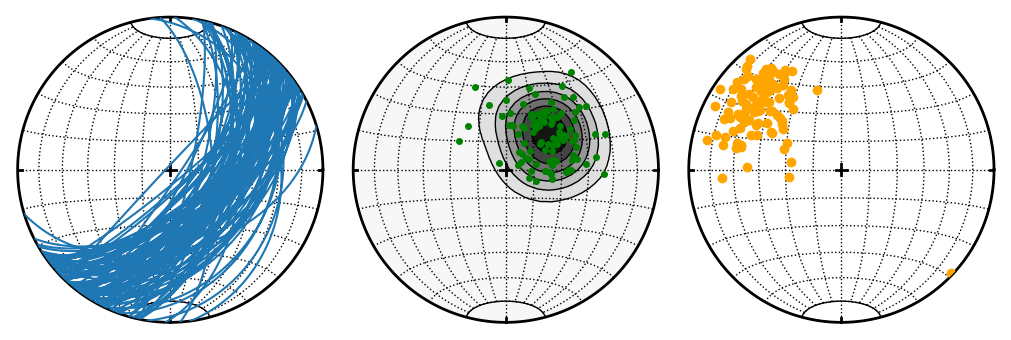
The beachball method plots the beach ball of a stress tensor. The two planes through the intermediate principal stress at 45 degrees to the maximum (P axis) and minimum (T axis) principal stresses divide the net into four quadrants, and the compressive ones, those containing the P axis, are filled (the principal stresses are shown by stress):
[12]:
S = stress([[8, 1, 0], [1, 5, 0], [0, 0, 1]])
s = StereoNet()
s.beachball(S)
s.stress(S)
s.show()
Beach balls of a Stress3Set add up where they overlap, so the orientations shared by all of the stress states stand out:
[13]:
import numpy as np

D = np.diag([8.0, 5.0, 1.0])
rotations = [rotation_from_axis_angle(lin(0, 90), a) for a in range(-20, 21, 10)]
sset = stressset([stress(R @ D @ R.T) for R in rotations])
s = StereoNet()
s.beachball(sset)
s.show()
Arcs#
An Arc describes a generalized curved path between two vectors, optionally bowed away from the plain great-circle connection via curvature (and positive/short to control the direction and which way around). StereoNet.arc() plots one or more Arc/ArcSet instances directly:
[14]:
s = StereoNet()
s.arc(arc(lin(0, 0), lin(90, 0)))
s.arc(arc(lin(0, 0), lin(90, 0), curvature=0.4, positive=False), color='r')
s.show()
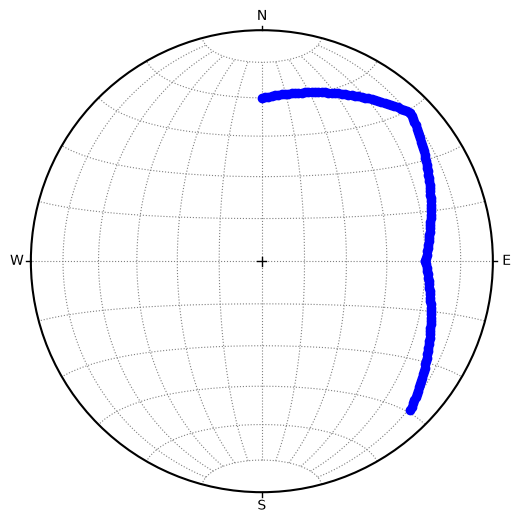
ArcSet.from_vectors() connects a chain of vectors (or a whole Vector3Set) into consecutive arcs, matching StereoNet.arc()’s own legacy calling convention. kind="points" renders the path as discrete markers instead of a solid line:
[15]:
path = arcset.from_vectors(lin(0, 30), lin(45, 10), lin(90, 30), lin(135, 10))
s = StereoNet()
s.arc(path, kind='points', color='b')
s.show()
kind="filled" fills the polygon bounded by the arcs taken in order (closed by a great-circle arc from the last point to the first) using color and alpha, without outline. Arcs going the other way around the great circle (short=False) are clipped to the displayed hemisphere:
[16]:
quad = arcset([arc(50, 30, 120, 60), arc(120, 60, 260, 50), arc(260, 50, 310, 40), arc(310, 40, 50, 30)])
s = StereoNet()
s.arc(quad, kind='filled', color='C0', alpha=0.5)
s.show()

[17]:
rest = arcset([arc(50, 30, 210, 30, short=False), arc(210, 30, 260, 40), arc(260, 40, 85, 20, short=False), arc(85, 20, 50, 30)])
s = StereoNet()
s.arc(rest, kind='filled', color='C3', alpha=0.5)
s.arc(rest, color='k')  # outline of the same arcs
s.show()

region="outside" fills the rest of the net instead, i.e. the remaining area of the full circle without the polygon:
[18]:
s = StereoNet()
s.arc(quad, kind='filled', region='outside', color='C0', alpha=0.5)
s.arc(quad, color='k')  # outline of the same arcs
s.show()

StereoNet styles#
Stereonets could be created using styles to re-use same styling on different data. Style factory methods use same names as StereoNet plotting method. Firstly we need to create styles to be used to visualize the data:
[19]:
s1 = stereonet_styles.point(color="darkblue", marker="X", ms=8, mec="white", label="Set 1")
s2 = stereonet_styles.point(color="orange", mec="k", label="Set 2")
[20]:
l1a = linset.random_fisher(position=lin(45,50))
l2a = linset.random_fisher(position=lin(250,50))
l1b = linset.random_fisher(position=lin(112,40))
l2b = linset.random_fisher(position=lin(320,50))
With styles, we can simply use StereoNet method plot:
[21]:
s = StereoNet()
s.plot(s1, l1a)
s.plot(s2, l2a)
s.show()

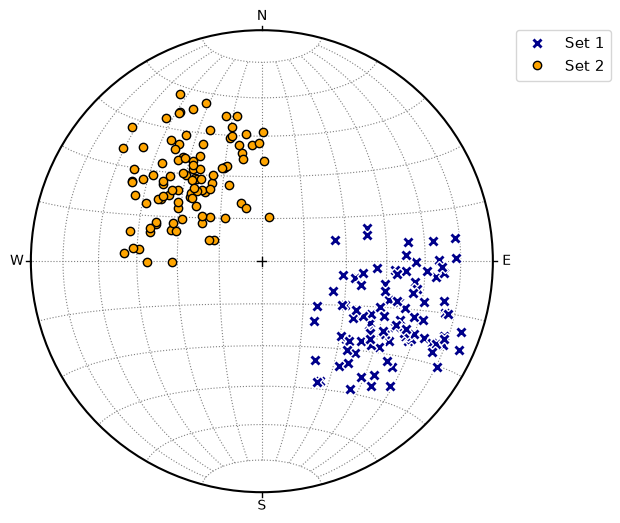
Another data with same style
[22]:
s = StereoNet()
s.plot(s1, l1b)
s.plot(s2, l2b)
s.show()
StereoGrid class#
StereoGrid class allows to visualize any scalar field on StereoNet. It is used for plotting contour diagrams, but it exposes apply_func method to calculate scalar field by any user-defined function. Function must accept three element numpy.array as first argument passed from grid points of StereoGrid.
Following example defines function to calculate resolved shear stress on plane from given stress tensor. A StereoGrid is created directly and passed to StereoNet.contour to plot it
[23]:
S = stress([[10, 2, -3],[2, 5, 1], [-3, 1, -2]])
g = StereoGrid()
g.apply_func(S.shear_stress)
s = StereoNet()
s.contour(g, levels=10)
s.show()

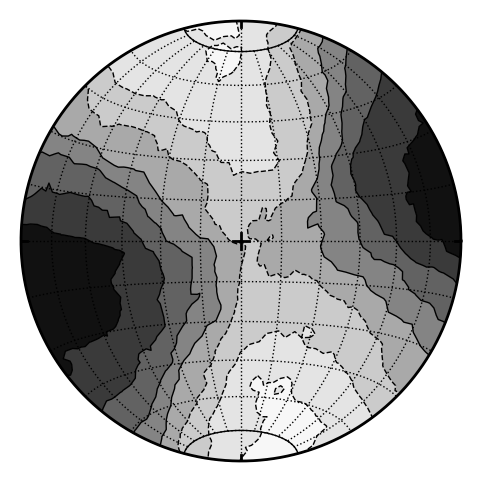
The StereoGrid also provides angmech (Angelier dihedra) method for paleostress analysis. Results are stored in StereoGrid. Default behavior is to calculate counts (positive in extension, negative in compression)
[24]:
f = faultset.from_csv('mele.csv')
g = StereoGrid()
g.angmech(f)
s = StereoNet()
s.contour(g, clip=False)
s.show()

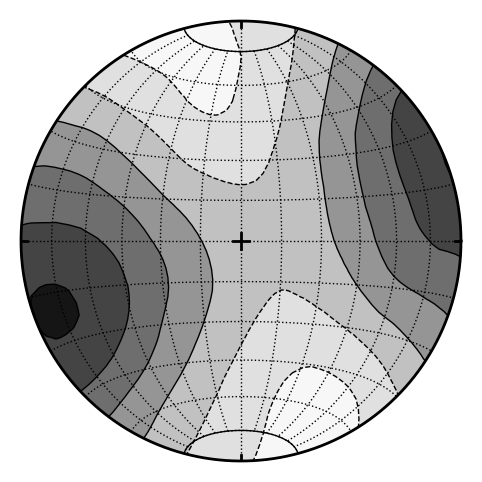
Setting method to probability, maximum likelihood estimate is calculated.
[25]:
f = faultset.from_csv('mele.csv')
g = StereoGrid()
g.angmech(f, method='probability')
s = StereoNet()
s.contour(g, clip=False)
s.show()

[26]:
g
[26]:
StereoGrid (gss, 3000 points)
Maximum: 30.6964 at L:246/32
Minimum: -29.0178 at L:356/36
A StereoGrid can be saved to and loaded from a file, so an expensive contouring/angmech calculation doesn’t need to be redone every time:
[27]:
import tempfile, os

path = os.path.join(tempfile.gettempdir(), "apsg_grid_demo.pkl")
g.save(path)
g2 = StereoGrid.load(path)
print(g2.max(), g2.max_at())
os.remove(path)
30.696441935173446 L:246/32
Equal-area (Schmidt) vs equal-angle (Wulff) net#
kind selects the projection: "equal-area" (aliases "schmidt"/"earea", the default) preserves area, "equal-angle" (aliases "wulff"/"eangle") preserves angles. Plotting the same foliation set on both nets side by side shows the difference – the Wulff net pushes features nearer the primitive circle further apart than the Schmidt net does.
[28]:
import matplotlib.pyplot as plt

f = folset.random_fisher(position=fol(130, 60), kappa=30)

fig = plt.figure(constrained_layout=True, figsize=(8, 4))
subfigs = fig.subfigures(1, 2)

s1 = StereoNet(kind="equal-area", title="Schmidt (equal-area)")
s1.great_circle(f)
s1.point(f)

s2 = StereoNet(kind="equal-angle", title="Wulff (equal-angle)")
s2.great_circle(f)
s2.point(f)

s1.render2fig(subfigs[0])
s2.render2fig(subfigs[1])
plt.show()

Lower vs upper hemisphere#
hemisphere selects which hemisphere axial data (point, great_circle, cone, contour, …) is projected onto – "lower" (default) or "upper". A line plunging into the lower hemisphere at a given azimuth plots at that azimuth on a lower net, and at the antipodal azimuth (same distance from center, i.e. same plunge magnitude) on an upper net.
vector() (genuinely directional data, as opposed to an axial line/pole) behaves differently: since a vector already has both a filled marker (pointing into the chosen hemisphere) and an open one at its antipode, the positions of the two markers stay the same between the two nets – only which one is filled vs open swaps.
[29]:
v = vecset.random_fisher(position=vec(130, 20), kappa=10)
l = linset.random_fisher(position=lin(50, 20), kappa=30)
f = folset.random_fisher(n=20, position=fol(275, 70), kappa=30)

fig = plt.figure(constrained_layout=True, figsize=(10, 4))
subfigs = fig.subfigures(1, 2)

s1 = StereoNet(hemisphere="lower", title="Lower hemisphere")
s1.vector(v, label="Vector")
s1.point(l, label="Axial")
s1.great_circle(f, label="Planes")

s2 = StereoNet(hemisphere="upper", title="Upper hemisphere")
s2.vector(v, label="Vector")
s2.point(l, label="Axial")
s2.great_circle(f, label="Planes")

s1.render2fig(subfigs[0])
s2.render2fig(subfigs[1])
plt.show()

Rotating the net – with and without following data#
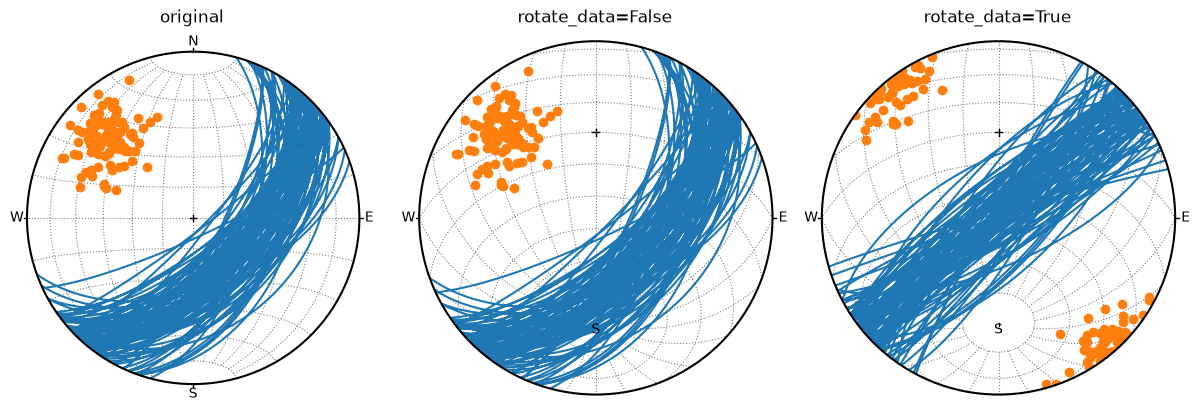
rotation (a 3x3 rotation matrix, or apsg’s own Rotation3) rotates the whole net. By default (rotate_data=True) the plotted data rotates along with the grid, so a fabric’s appearance relative to the grid is unchanged – only the whole picture is reoriented. With rotate_data=False only the grid/graticule rotates while already-plotted data stays anchored to the true, unrotated geographic frame – useful for viewing fixed data against a differently-oriented reference net (e.g. a
core reference frame).
rotation_from_axis_angle(axis, angle_deg) builds a rotation matrix from an axis (any Vector3-like NED direction) and an angle in degrees; apsg’s own Rotation3 (e.g. Rotation3.from_pair(...)) works equally well.
[30]:
R = rotation_from_axis_angle(lin(90, 0), 40)  # 40 degrees about a horizontal E-W axis

f = folset.random_fisher(position=fol(130, 60), kappa=30)

fig = plt.figure(constrained_layout=True, figsize=(12, 4))
subfigs = fig.subfigures(1, 3)

s1 = StereoNet(title="original")
s1.great_circle(f)
s1.point(f)

s2 = StereoNet(rotation=R, rotate_data=False, title="rotate_data=False")
s2.great_circle(f)
s2.point(f)

s3 = StereoNet(rotation=R, title="rotate_data=True")
s3.great_circle(f)
s3.point(f)

s1.render2fig(subfigs[0])
s2.render2fig(subfigs[1])
s3.render2fig(subfigs[2])
plt.show()
StereoNet.set_rotation() (with the matching .rotation property) applies the same rotation to an already-built net, equivalent to passing rotation= at construction time:
[31]:
s = StereoNet(title="set_rotation")
s.great_circle(f)
s.point(f)
s.set_rotation(R)
s.show()

Quick plot one-liner#
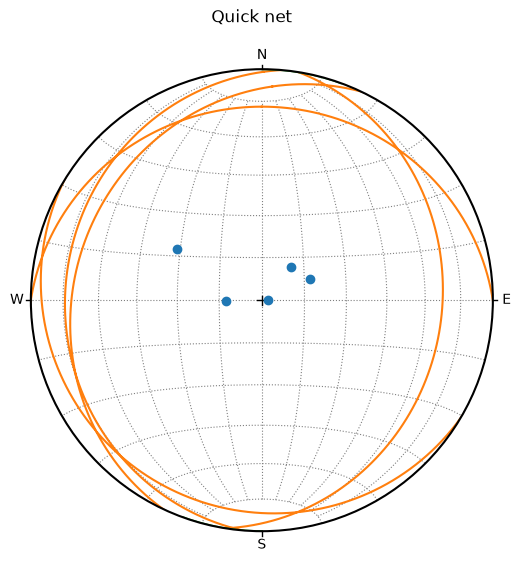
quicknet() builds a StereoNet, dispatches each argument to whichever plotting method matches its type – lines/poles, planes, pairs, faults, cones, arcs, tensors, stress tensors (and their sets), or a StereoGrid contour – and shows it, all in one call:
[32]:
l3 = linset.random_fisher(n=5)
f3 = folset.random_fisher(n=5)
quicknet(l3, f3, cone(lin(0, 90), lin(0, 0), 20), title="Quick net")
[ ]: